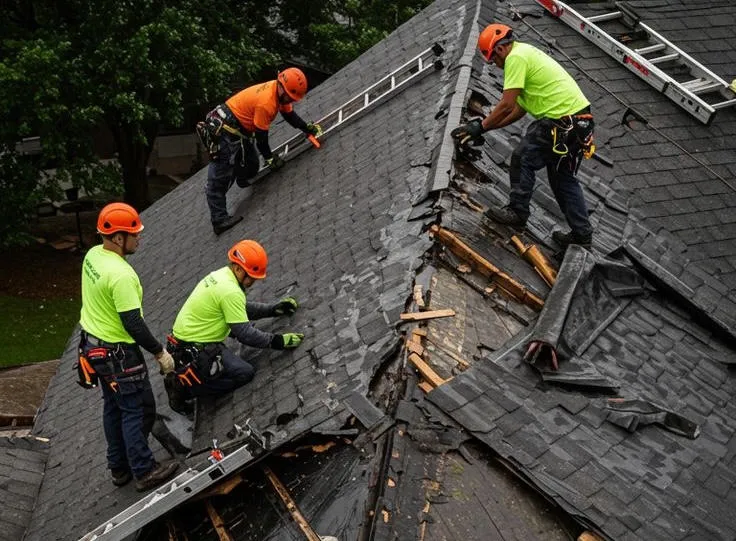
Pre-Inspection Safety and Preparation
Before you step outside to assess potential roof damage, your safety and preparation determine how effective and secure your inspection will be. Cedar Rapids experiences severe weather patterns throughout the year, from spring hailstorms that can strike with little warning to heavy snow loads in January and February that stress roofing structures. The timing of your inspection matters significantly: wait at least 24 hours after a major storm passes to ensure all hazardous conditions have cleared, including standing water, lingering winds, and downed power lines.
Your inspection toolkit should include binoculars for distance viewing, a digital camera or smartphone with a quality camera for documentation, a flashlight for interior checks, work gloves, and non-slip footwear. Never attempt to climb onto a wet, icy, or steeply pitched roof. Most meaningful damage can be spotted from the ground, from a ladder at eave height, or from inside your attic. If you must use a ladder, ensure it extends at least three feet above the roofline, position it on stable ground, and have a second person hold it steady.
Check the weather forecast before you begin. Iowa’s unpredictable spring weather can bring a second wave of storms within hours of the first, and humidity levels in summer months can make surfaces deceptively slippery even when they appear dry. Schedule your inspection during mid-morning or early afternoon when lighting is optimal and temperatures are moderate. If you observe significant structural damage, large sections of missing shingles, or sagging areas, do not proceed with a personal inspection. These are signs that professional assessment is immediately necessary to prevent injury or further property damage.
Ground-Level Exterior Assessment
Begin your exterior assessment by walking the perimeter of your home at a distance that allows you to view the entire roofline. Use binoculars to examine the roof surface systematically, working from ridge to eave in vertical sections. Look for missing, cracked, or curling shingles, which are common after high winds. In Cedar Rapids, spring storms with straight-line winds exceeding 60 mph can lift shingle edges and break the sealant bond, leaving your roof vulnerable to water infiltration even if shingles remain partially attached.
Pay close attention to roof valleys, the V-shaped channels where two roof planes meet. These areas channel heavy water flow and are prone to damage. Inspect all flashing around chimneys, vent pipes, skylights, and where the roof meets vertical walls. Flashing should lie flat without gaps, rust, or bent sections. Hail damage often appears as dark spots or divots on shingles where granules have been knocked off, exposing the asphalt underneath. The size and pattern of these marks can indicate hail diameter, which insurance adjusters will document during claims processing.
Examine your gutters and downspouts next. Look for dents in metal gutters, which indicate hail impact. Check for granule accumulation in gutters and at downspout outlets; excessive granules signal shingle deterioration. Gutters pulling away from fascia boards or showing visible gaps at seams suggest either storm damage or pre-existing issues that the storm exacerbated. Note any debris accumulation, including branches, leaves, or roofing materials, and photograph these findings before removal.
Inspect the ground around your home’s foundation for shingle pieces, flashing fragments, or an unusual amount of roofing granules. These materials on the ground are direct evidence of roof damage. If you discover damaged siding, dented window frames, or splintered trim alongside roofing concerns, document all exterior damage together, as comprehensive repair services can address multiple systems during a single project, saving time and ensuring consistent quality.
Interior Warning Signs and Attic Inspection
Interior inspection reveals damage that exterior viewing cannot detect, particularly water intrusion that has penetrated the roofing system. Begin in your attic or highest accessible crawl space. Visit during daylight hours and bring a powerful flashlight to examine areas away from natural light sources. Look at the underside of your roof decking for water stains, dark streaks, or discoloration. Fresh water damage appears as darker, wet-looking patches, while older damage shows as dried rings or yellowed areas.
Run your hand along the underside of the roof decking if you can safely reach it. Soft, spongy wood indicates water saturation and potential rot. Check insulation for compressed, matted, or discolored sections; wet insulation loses its effectiveness and can harbor mold growth. During and after Iowa’s humid summer months, even minor leaks can create conditions for rapid mold development, which poses health risks and complicates insurance claims if not addressed promptly.
Trace any water stains to their highest point. Water travels along rafters, trusses, and decking before dripping onto insulation or ceiling materials, so the visible stain location may be several feet from the actual roof penetration. Look for daylight visible through the roof decking, which indicates holes or gaps. Check around roof penetrations including vent pipes, exhaust fans, and chimney chases, as these are common failure points during severe weather.
Move through your home’s upper floor rooms and examine ceilings and walls near the roofline. Bubbling paint, peeling wallpaper, sagging ceiling sections, or new cracks near corners where walls meet ceilings all suggest water intrusion. Even small water spots that appear dry should be documented, as they indicate your roofing system has been compromised. If you notice a musty odor in upper-level rooms or the attic, moisture has likely been present long enough to create mold or mildew. In these situations, professional inspection services can identify the full extent of damage using moisture meters and thermal imaging equipment that detect problems invisible to the naked eye.
Documentation Best Practices
Thorough documentation transforms your inspection findings into actionable evidence for insurance claims and contractor estimates. Begin photographing immediately after you identify damage, while conditions remain unchanged. Take wide-angle shots that show your entire roof and the surrounding property, establishing context for the damage location. Follow with medium-range photos of each damaged section, and close-up images that clearly show specific issues like missing shingles, dented flashing, or cracked sealant.
Include a measuring reference in close-up photos when possible. A standard ruler, tape measure, or even a coin provides scale that helps adjusters assess damage severity. Photograph the same damage from multiple angles and in different lighting conditions if weather permits. Date and time stamps on photos establish a timeline, which is particularly important if you cannot file your claim immediately. Create a simple numbering or labeling system: roof section 1, photo A through D, for example, then maintain this organization throughout your documentation.
Write detailed notes as you photograph. Record the date and time of both the storm event and your inspection. Describe what you see in specific terms: “three shingles missing on southwest corner, approximately 8 feet from ridge” is far more useful than “some damage on the roof.” Note weather conditions during your inspection, as rain or snow can obscure certain damage types. If you collected physical evidence like shingle fragments, bag and label these items with the location where you found them.
Compile your documentation into a organized format before contacting your insurance company. A simple folder with printed photos (or a digital folder with clearly named files), your written notes, and any relevant receipts creates a professional presentation that facilitates claim processing. Cedar Rapids area homeowners filing storm damage claims should also document any temporary repairs made to prevent further damage, including tarp installation or emergency leak sealing, as these costs are typically reimbursable. When you are ready to move forward with your claim and repairs, working with contractors who offer insurance claim assistance can streamline the process significantly, as they understand documentation requirements, can meet with adjusters on your behalf, and ensure nothing is overlooked in your claim submission.
When to Contact Professional Roofers
Thorough documentation transforms your inspection findings into actionable evidence for insurance claims and contractor estimates. Begin photographing immediately after you identify damage, while conditions remain unchanged. Take wide-angle shots that establish context, showing the damaged area in relation to the entire roof section, then capture close-up images that reveal specific damage details such as granule loss, cracked shingles, or dented flashing.
Create a systematic photo inventory by moving clockwise around your home and numbering each image sequence. Photograph all four roof elevations, even those without visible damage, to provide complete documentation. Include reference objects in your close-up shots: place a quarter next to hail dents or a measuring tape beside cracks to establish scale. Insurance adjusters and roofing contractors require this dimensional evidence to assess repair scope accurately.
Document interior damage with equal thoroughness. Photograph water stains on ceilings and walls from multiple angles, capturing both the stain itself and its location within the room. Take images of attic damage showing wet insulation, water trails on rafters, and any daylight visible through roof penetrations. Include timestamps on all photos when possible, or maintain a written log noting the date and time of each inspection session.
Record weather event details that caused the damage. Note the storm date, approximate duration, wind direction, and precipitation type. Cedar Rapids residents can reference National Weather Service archives for official storm data, including hail size reports and wind speed measurements. This meteorological record strengthens your claim by correlating visible damage with documented severe weather.
Compile your documentation into an organized digital folder with clear file names: “North_Roof_Overview_2026-09-30” or “Attic_Water_Stain_East_Corner.” Keep both digital and printed copies. Share this complete package with your insurance adjuster and any roofing contractors providing estimates. Professional roof inspection services can supplement your documentation with thermal imaging and moisture meter readings that detect hidden damage your photos cannot capture. When filing claims, comprehensive documentation reduces disputes and expedites approval, ensuring you receive appropriate coverage for necessary repairs.