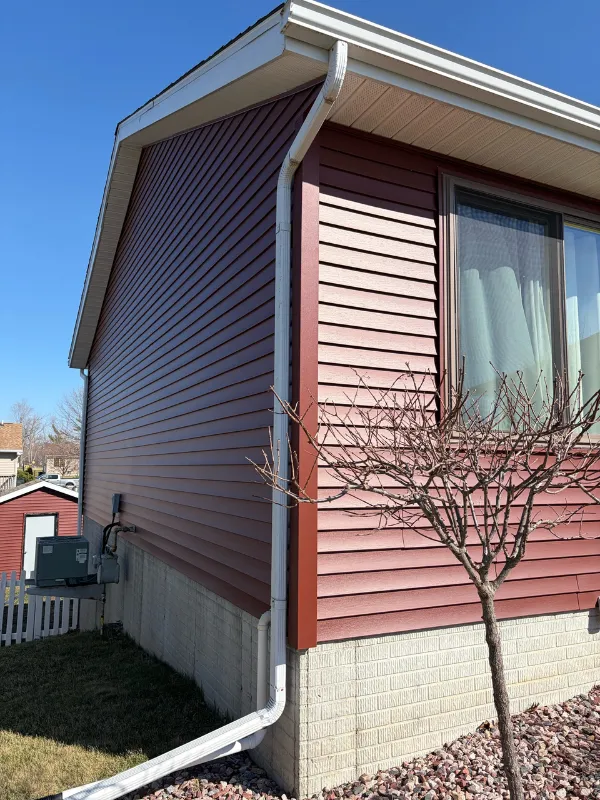
Ignoring Proper Drainage Behind Siding
One of the most damaging mistakes you can make is installing siding without proper water management systems behind it. When moisture gets trapped between your siding and exterior sheathing, it creates the perfect environment for rot, mold growth, and structural damage that can cost tens of thousands to repair down the road.
In central Iowa, we see this problem accelerate quickly. Spring storms dump heavy rain, summer humidity sits in the 70–80% range for weeks at a time, and winter freeze-thaw cycles push water into every tiny gap. Without a properly installed weather-resistant barrier and drainage plane, that moisture has nowhere to go except into your wall cavity and framing.
The fix starts before the first panel goes up. A quality siding installation includes a continuous water-resistive barrier (housewrap or building paper) that overlaps correctly at seams and around windows. Behind that, a drainage mat or furring strips create an air gap that lets water run down and out while allowing the wall assembly to dry. Flashing at windows, doors, and penetrations must be integrated properly, not just slapped on as an afterthought.
We also see homeowners skip step flashing where siding meets rooflines or deck ledgers. In the Cedar Rapids and Swisher area, where many homes have complex rooflines and attached porches, these junctions are where leaks start. Every transition point needs metal flashing installed in the correct sequence so water flows over, not under, each layer.
What should you do? If you’re planning a siding project, ask your contractor to walk you through their water management plan before work starts. They should be able to explain the drainage plane, show you the flashing details, and confirm that everything meets current building codes. If they brush off these questions or say “the siding itself keeps water out,” that’s a red flag. At Sunstone Exteriors, we treat the drainage system as the foundation of every siding installation we do, because we’ve seen firsthand what happens when it’s done wrong. If you’re concerned about an existing installation or want a second opinion before moving forward, contact us for an estimate and we’ll review your specific situation.
Choosing The Wrong Material For Your Climate
Not all siding materials perform equally in Iowa’s demanding climate. We experience temperature swings of 80 degrees or more between January lows and July highs, plus high humidity in summer and brutal freeze-thaw cycles in spring. A material that works beautifully in Arizona or coastal California can fail spectacularly here if it’s not designed for our conditions.
The most common mistake we see is choosing a material based purely on looks or initial cost, without considering how it will hold up over 20–30 years in central Iowa weather. Thin vinyl siding without proper thickness ratings will warp and crack during temperature extremes. Fiber cement requires correct installation techniques and regular maintenance, especially around trim and seams, or it will absorb moisture and deteriorate. Wood siding looks stunning but demands a level of ongoing care that most homeowners underestimate, especially with our humidity levels.
Here in the Swisher and Cedar Rapids area, the siding that performs best is engineered for our climate zone. Look for vinyl with a minimum thickness of .044 inches and a strong impact resistance rating, because hailstorms are a regular occurrence. If you prefer the look of wood, consider engineered wood products with baked-in moisture barriers, or go with fiber cement from manufacturers who provide specific installation guidelines for freeze-thaw climates. Metal siding, particularly steel or aluminum, handles temperature swings well but needs proper insulation backing to prevent condensation issues.
Material choice also impacts your insurance rates and resale value. Many buyers in our market specifically look for low-maintenance options that can handle Iowa weather without constant upkeep. When we work with homeowners on siding installation projects, we walk through the pros and cons of each material for their specific home, budget, and maintenance preferences. We’ve installed every type of siding available, and we can show you examples of how each performs after 10, 15, or 20 Iowa winters.
Before you commit to a material, ask to see installed examples that are at least five years old in your area. Look for fading, warping, or separation at seams. Check how the material has handled around south and west exposures, where sun and weather hit hardest. If you’re unsure which material makes the most sense for your home and budget, contact us for an estimate. We’ll assess your home’s specific conditions and recommend materials that will still look great and perform well decades from now.
Attempting DIY Installation Without Experience
Siding installation looks deceptively simple when you watch it happen, but the details that separate a 30-year installation from a five-year failure are invisible from the ground. We regularly get calls from homeowners who started a siding project themselves or hired an unqualified handyman, only to discover major problems a year or two later when panels start buckling, gaps appear, or water damage shows up inside walls.
The most common DIY mistakes involve fastening. Every siding material has specific requirements for nail placement, depth, and spacing. Drive nails too tight and the siding can’t expand and contract with temperature changes, it will buckle and warp within a single season. Place nails in the wrong part of the slot or use the wrong fastener type, and panels will pull loose during high winds or thermal cycling. We’ve seen entire walls of siding installed with nails driven flush or countersunk, which is completely wrong for vinyl and guarantees failure.
Corners, trim, and transitions are where DIY projects fall apart. Inside and outside corners need to be plumb, with proper clearances at top and bottom for expansion. J-channel around windows and doors must be cut and assembled in the correct sequence with proper flashing integration, or water will find its way behind the siding at every opening. Soffit and fascia connections require precise measurements and cutting, and any gaps or misalignments become permanent eyesores and potential leak points.
In our area, we also see DIYers skip critical steps like installing starter strips level and straight, which throws off every subsequent course. On older homes common in Marion, Iowa City, and Cedar Rapids, walls are rarely perfectly plumb or level, and experienced installers know how to adjust and compensate so the finished siding looks straight even when the framing isn’t. Without that knowledge, you end up with wavy siding lines and panels that don’t align at corners.
There’s also the equipment factor. Professional installations use scaffolding, power brakes for custom trim, and specialized cutting tools that produce clean, accurate cuts. Trying to work off ladders with a circular saw and tin snips leads to poor cuts, safety risks, and a lot of wasted material. The money you think you’re saving on labor often gets eaten up by material waste, tool rental, and the time cost of learning as you go.
If you’re handy and want to tackle small projects, consider starting with a shed or detached garage, not your home’s main exterior. For your house, the risks are too high and the potential for costly mistakes too great. A professional siding installation includes proper permitting, insurance coverage, and warranties that protect your investment. At Sunstone Exteriors, we’ve spent years perfecting installation techniques and we stand behind every job we do. If you’re thinking about siding work, contact us for an estimate and we’ll show you exactly what’s involved and why the investment in professional installation pays for itself in longevity and performance.
Skipping Regular Maintenance And Inspections
Even the best siding installation won’t last if you ignore it for years at a time. Siding is your home’s first line of defense against weather, pests, and moisture, and it needs regular attention to catch small problems before they become expensive emergencies. We’ve seen beautiful five-year-old siding that’s already failing because homeowners never inspected caulk lines, cleared debris from drainage paths, or noticed early signs of damage.
In Iowa’s climate, seasonal maintenance is especially important. Spring is the time to inspect for winter damage, ice accumulation can crack panels and loosen fasteners, especially on north-facing walls. Summer is when you should check caulk and sealant around windows, doors, and penetrations, because UV exposure and temperature cycling break down even high-quality sealants over time. Fall is the season to clear gutters and check that water is draining away from the foundation, because winter freeze-thaw cycles will exploit any moisture problems you leave unaddressed.
What should you look for during inspections? Walk around your home at least twice a year and check for loose or missing panels, cracks or holes (especially near ground level where weed trimmers and lawn mowers can cause damage), and any gaps or separation at seams and corners. Look up at soffit and fascia areas for wasp nests, bird nests, or signs of animal intrusion. Check that weep holes at the bottom of panels aren’t clogged with dirt or spider webs, these are critical for drainage.
Pay special attention to areas where different materials meet: where siding connects to brick or stone, around deck ledgers, and anywhere dissimilar materials are joined. These junctions move at different rates with temperature changes and are prone to separation and gap formation. A bead of paintable caulk applied every few years prevents water intrusion and maintains a clean appearance.
We also recommend keeping trees and shrubs trimmed back from siding. In the Swisher and North Liberty area, where mature trees are common, branches that rub against siding during wind will wear through the finish and damage panels over time. Bushes planted too close trap moisture against the siding and prevent air circulation, creating conditions for mold and mildew growth.
Many homeowners don’t realize that siding warranties require regular maintenance, and failure to maintain can void coverage. If you’re not sure what your siding needs or you’ve noticed something that doesn’t look right, it’s worth having a professional take a look. At Sunstone Exteriors, we offer inspections that identify potential issues before they turn into major repairs. We can also handle maintenance tasks like caulking, panel replacement, and cleaning that keep your siding performing as it should. If it’s been a while since anyone looked at your siding, contact us for an estimate and we’ll give you a thorough assessment of what’s needed to protect your investment for years to come.
Ignoring Ventilation Requirements
Proper ventilation behind and around your siding is just as important as the siding itself, but it’s something many homeowners and even some installers overlook. Without adequate airflow, moisture gets trapped in wall cavities and attic spaces, leading to condensation, mold growth, wood rot, and insulation damage. In Iowa’s humid summers and cold winters, ventilation problems can destroy a wall assembly in just a few years.
The most critical ventilation area is where your siding meets your roof system. Soffit vents need to be open and unobstructed, working in combination with ridge or gable vents to create continuous airflow through your attic. When we install siding, we make sure soffit vents remain clear and functional, and we add vented soffit material where needed. We’ve seen too many homes where vinyl soffit was installed solid with no perforations, or where insulation was packed into eaves and blocked existing vents. The result is attic temperatures that soar in summer and condensation that drips down into walls in winter.
Behind the siding itself, the drainage plane we discussed earlier also serves as a ventilation channel. That small air gap, typically created with furring strips or a drainage mat, allows air to circulate behind panels and carry away moisture before it can cause problems. This is especially important with vinyl and metal siding, which don’t breathe the way wood does. Without that gap, temperature differences between inside and outside create condensation on the back of siding panels, and that moisture has nowhere to go except into your sheathing and framing.
In the Cedar Rapids and Iowa City area, where many homes have brick or stone on the lower level and siding above, we pay extra attention to the transition zone. Brick naturally wicks moisture, and if siding is installed too close or without proper venting, that moisture can migrate into the siding system. We install a ventilated gap and make sure flashing directs any moisture outward, not up into the wall cavity.
Bathroom and kitchen vents that exhaust through sidewalls also need special attention during siding installation. The vent must be properly integrated with a vent hood that keeps weather out while allowing exhaust to escape freely. We’ve seen installations where the vent pipe was simply poked through the siding with no proper flashing or sealing, creating both a leak point and a ventilation failure.
How do you know if your home has ventilation problems? Look for signs like condensation on windows in winter, musty odors in certain rooms, or unusually high cooling bills in summer. In the attic, look for dark staining on sheathing, frost buildup in winter, or insulation that looks compressed or damp. These are all signs that ventilation isn’t working correctly, and addressing them often requires siding and soffit work to restore proper airflow.
Ventilation requirements vary based on your home’s design, insulation levels, and HVAC system, so there’s no one-size-fits-all solution. When we do a siding installation, we evaluate the entire building envelope to make sure ventilation, insulation, and moisture control are all working together. If you’re experiencing condensation issues, high energy bills, or you’re just not sure whether your home is ventilating properly, contact us for an estimate. We’ll assess your specific situation and recommend solutions that protect your home from the inside out.